Sauerkraut in a Mason Jar

Sauerkraut in a Mason Jar

Course Side Dish, veggie, salad
Servings 10

Ingredients
  

  • 1 head cabbage shredded
  • 1 tbsp pickling salt

Instructions
 

  • 1. Sterilize 4 quart jars, lids, bowls, and other utensils to be used in packing the kraut by placing in boiling water for 10 minutes or in the dishwasher.
  • 2. In a non-reactive bowl (stainless steel or ceramic is good), thoroughly mix shredded cabbage and salt, bruising cabbage to start to release juices. Allow to stand for 5 minutes.
  • 3. Using your hands, press down and massage cabbage or use a masher. Continue until the cabbage becomes soft and you can see juices in the bottom of the bowl.
  • 4. Pack in sterilized jars. With wooden spoon, press cabbage down firmly, trying to release any air pockets as best you can. Continue to pack in jar until cabbage is about 1/2 inch from top of jar, and juices are about 1/4 inch from top.
  • 5. If juice from cabbage is not covering the cabbage in the jar, make a quick brine (boil 1.5 Tablespoons of pickling salt with 1 quart water) and pour over cabbage.
  • 6. Place lid on jar just tightly enough to keep out air.
  • 7. Keep jar between 65 degrees F and 72 degrees F for 2-3 weeks (place on tray or surface where you can catch and discard any juices that bubble through the lid)
  • 8. When bubbling stops, check to be sure there is still enough juice to cover the kraut. If not, make brine again and cover cabbage.
  • 9. Re tighten lid and store in refrigerator.

Bone Broth

Why is bone broth so healthy?? Answer:

1. Heal and seal your gut. The gelatin in bone broth protects the gut by supporting mucosal lining, and by providing proteins that support the immune system.

2. Protect your joints. Taking glucosamine supplements to help with joint pain has been common knowledge for years, but it turns out that bone broth has glucosamine too. But unlike pills, the broth also includes a host of other goodies that help keep your joints happy, healthy, and pain-free. The chondroitin sulfate in bone broth has been shown to help prevent osteoarthritis.

3. Look younger. Bone broth is a rich source of collagen. You can find collagen in all kinds of “plumping” products these days, but why stick it on the outside when you can drink it? Not only is drinking it cheaper, but it can make your skin, hair, and nails look just as radiant.

4. Sleep better, and feel better. The glycine in bone broth has been shown in several studies to help people sleep better and improve memory by supporting neurotransmitter formation.

5. Immune support. Mark Sisson, author of The Primal Blueprint, actually calls bone broth a “superfood” thanks to the high concentration of minerals. He says that the bone marrow can help strengthen your immune system. (Something that won’t surprise your grandma who always made you her famous chicken soup when you got sick!) A Harvard study even showed that some people with auto-immune disorders experienced a relief of symptoms when drinking bone broth, with some achieving a complete remission.

6. Stronger bones. The phosphorus, magnesium, and calcium in the bones seeps out into the broth leaving you with the essential building blocks for healthy bones.

7. It’s very economical! What else were you going to do with those chicken carcasses, soup bones, and veggies going bad in your fridge?

Bone Broth

Course Drinks, Soup
Servings 8

Ingredients
  

  • 4 lb Bones free range chicken bones, beef marrow/ any organic bones labelled 'soup'- may even use fish heads
  • 1/2 cup apple cider vinegar
  • 4 quarts water
  • 3 stalks celery
  • 3 medium carrots halved
  • 3 medium onions quartered
  • 1 bunch parsley
  • 1 tbsp sea salt

Instructions
 

  • 1. Place bones, vinegar, and water in large stew pot. Let sit for one hour. Add more water if needed to cover bones.
  • 2. Transfer pot to stove top. On medium heat, add celery, carrots, and onions. Bring to boil, and skim any film from top; discard.
  • 3. Reduce to simmer. Cover and cook for 24-72 hours (can turn off burner overnight, put pot in fridge, and restart in morning if you prefer)
  • 4. For the last 10 minutes, add the parsley.
  • 5. Cool broth in refrigerator for 30 minutes to 1 hour. Strain broth and discard bones and vegetable remnants.
  • 6. May store in fridge for up to 7 days. May freeze broth in ice cube trays, or freezer safe containers for up to 6 months.
  • Use in soups, stews, smoothies, or drink on it's own.

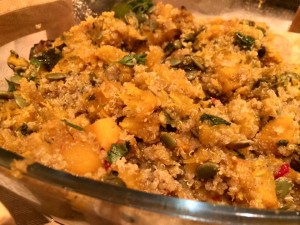
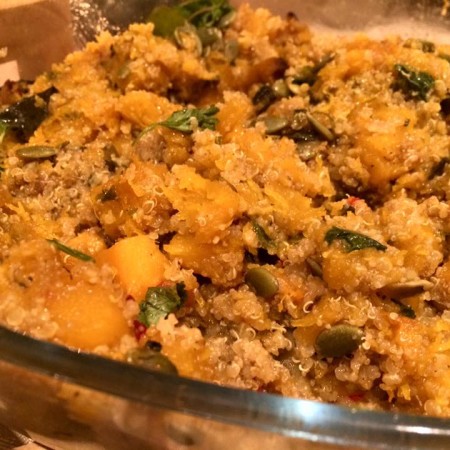
Ginger Roasted Pumpkin and Quinoa Salad with Mine, Chilli, and Lime

Pumpkin Quinoa Dish

Ginger Roasted Pumpkin and Quinoa Salad with Mine, Chilli, and Lime

Course Main Dish, Side Dish
Servings 8 servings

Ingredients
  

  • 2 lb pumpkin roast, peel, and cube into bite size pieces
  • 1 tbsp ginger freshly grated
  • 2 green or red chillis finely chopped
  • 2 tbsp olive oil extra virgin
  • 2 teaspoons pure maple syrup
  • 2 bunch cilantro finely chop one bunch; set leaves of other bunch aside
  • 1 pinch sea salt and pepper to taste
  • 1 cup quinoa
  • 1.5 cups water
  • 2 limes juiced
  • 1 bunch mint leaves
  • 1/2 cup pumpkin (pepita) seeds

Instructions
 

  • Pre-heat oven to 200-400 degrees F. Combined roasted pumpkin with ginger, chilli, garlic, olive oil, maple syrup and cilantro. season with salt and pepper. Spread out on large baking sheet. Bake 25-30 minutes, turning once or twie or until the pumpkin is golden and soft through. Remove from oven and cool slightly. In small saucepan, boil quinoa in the water. reduce heat to simmer and cook for 10-12 minutes until quinoa absorbs all the water. turn off heat and keep lid on, steaming for 5 more minutes. Remove lid and fluff quinoa. In large bowl, combine pumpkin mixture and quinoa. juice lime over mixture, and add mint and other cilantro leaves. Add more salt and pepper if needed. Sprinkle top with pumpkin seeds. This dish may be served warm or cool.